
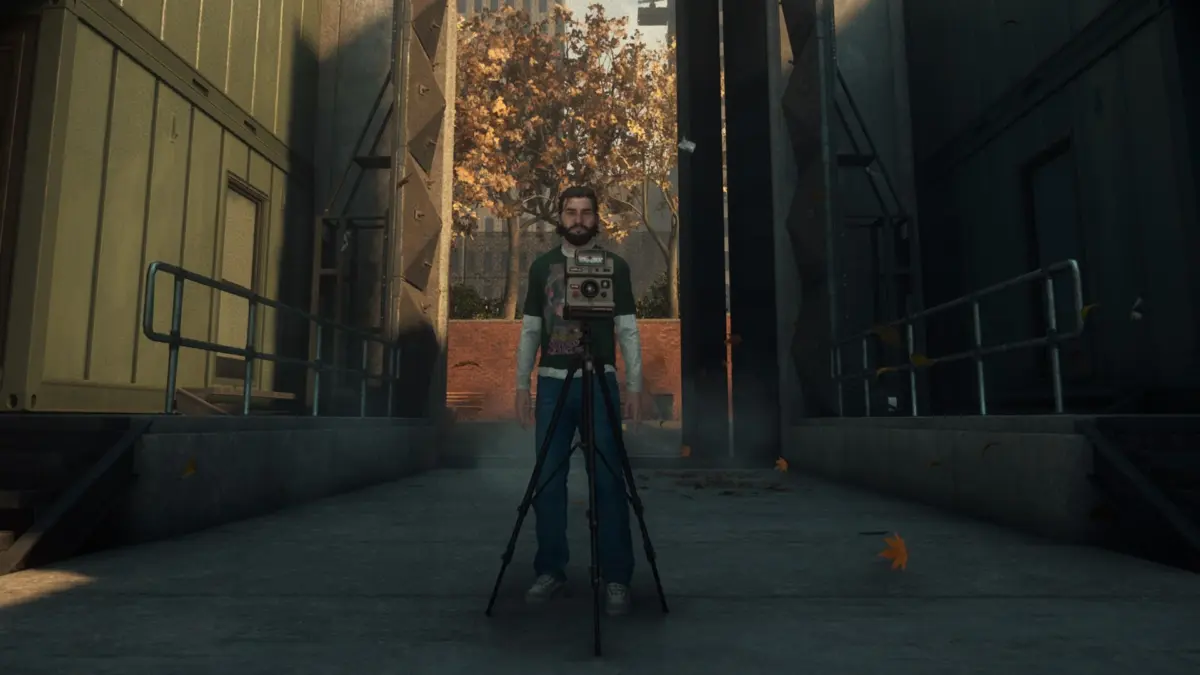
The release of Control Resonant has introduced players to a myriad of mind-bending anomalies, none quite as disruptive as the entities featured in the "Freeze Frame" questline. This challenging mission requires players to hunt down a series of anomalous, hostile cameras scattered across every major zone of the game. These devices possess the unsettling ability to instantly freeze the protagonist in place the moment their lenses capture a clear image, posing a significant threat not only to the player character but also to any civilians caught in the crossfire.
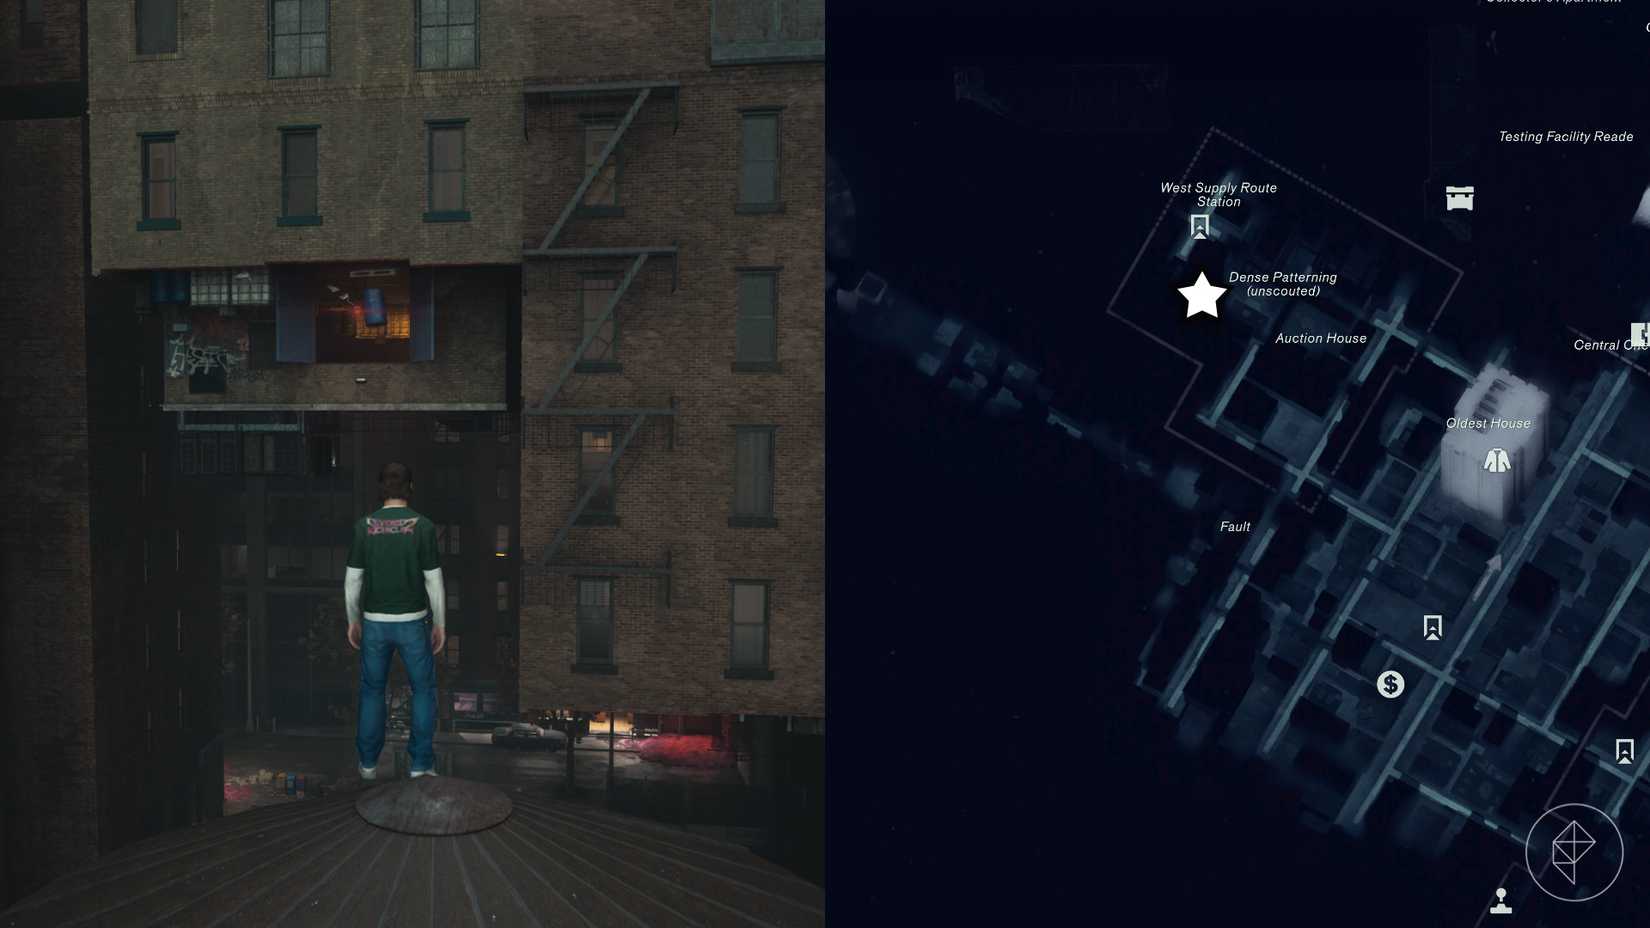
Successfully neutralizing these devices demands a strategic approach that goes beyond standard combat encounters. Players are tasked with avoiding the direct line of sight of each lens, often utilizing traversal abilities to flank the cameras from behind and manually shut off their mechanical lids. While the game provides instant photographs as rudimentary hints to pinpoint their general whereabouts, these snapshots offer limited geographic context, making a thorough understanding of the environment and movement mechanics essential. Veteran players strongly advise acquiring the Shift and Reach traversal abilities prior to launching a systematic hunt for the cameras, as multiple units remain entirely inaccessible without these pivotal upgrades.
Downtown ‘Freeze Frame’ Camera Locations
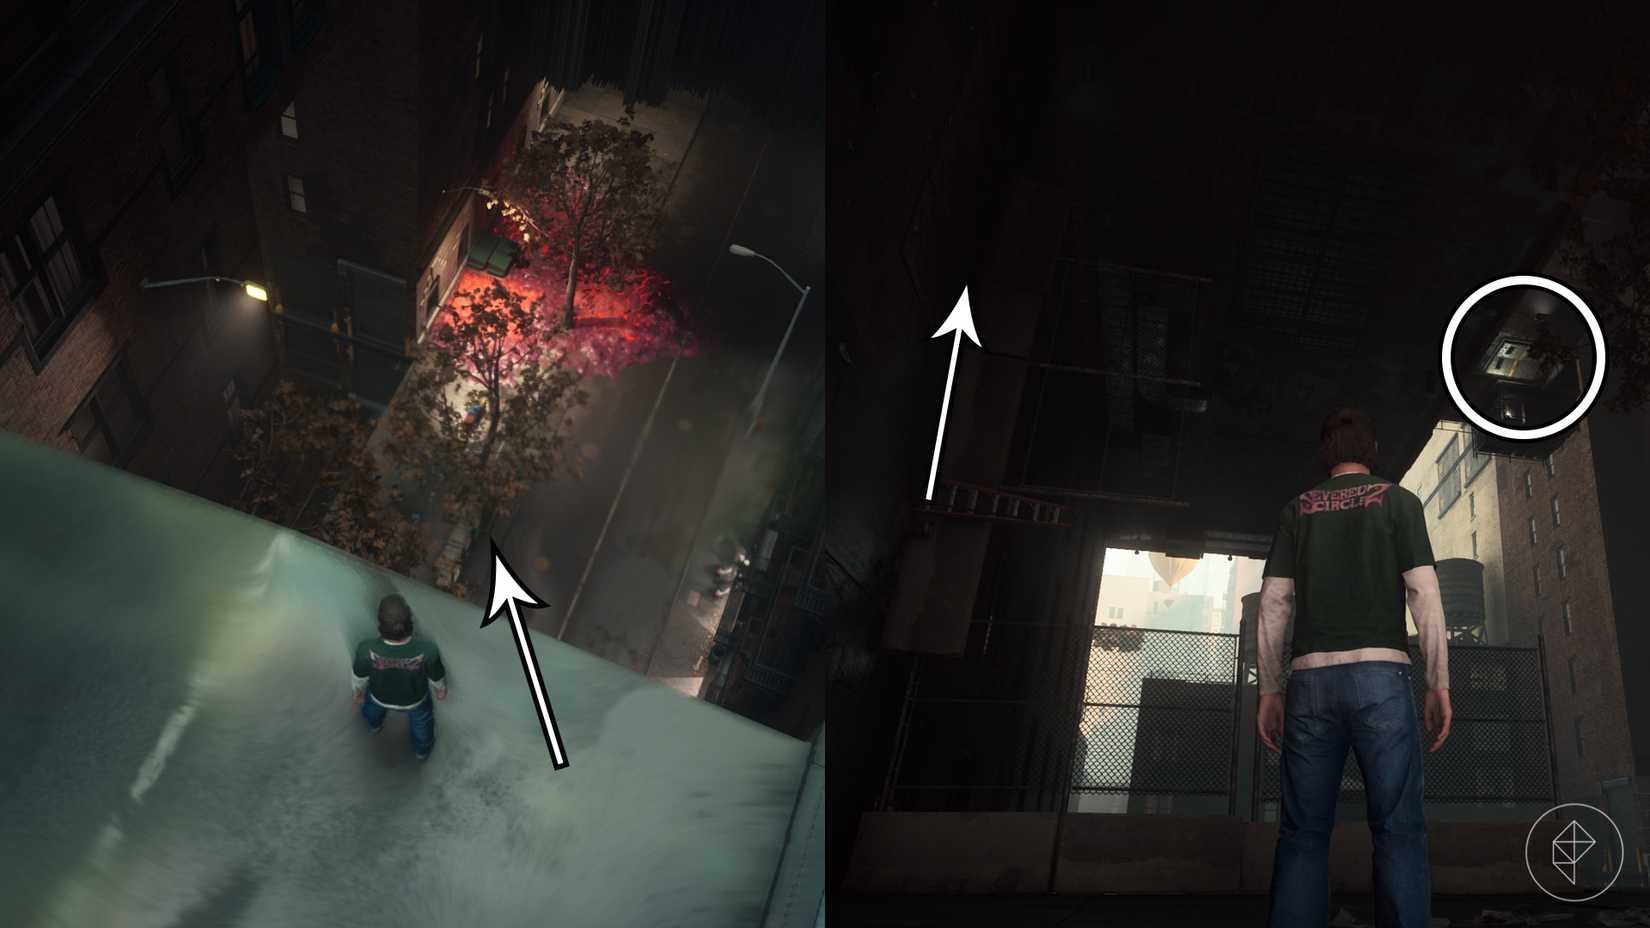
The urban sprawl of Downtown hosts two distinct cameras, each requiring specific traversal skills to reach and disarm. The first of these anomalies can be found within the northwestern sector of Downtown, positioned just east of the Dense Patterning area and directly south of the West Supply Route Station. Reaching this location requires the Shift ability, which is obtained by clearing the Incursion Fault located within the West Incursion Zone. Players navigating to this area will typically follow the roadway southwest from the West Supply Route Station, descending onto a lower street level where an inverted, upside-down building looms to the east. By utilizing the Shift ability to scale the vertical wall on the left, players can drop onto the rooftop housing a locked metal door, which must then be breached using the Crush ability to access and deactivate the camera housed inside.
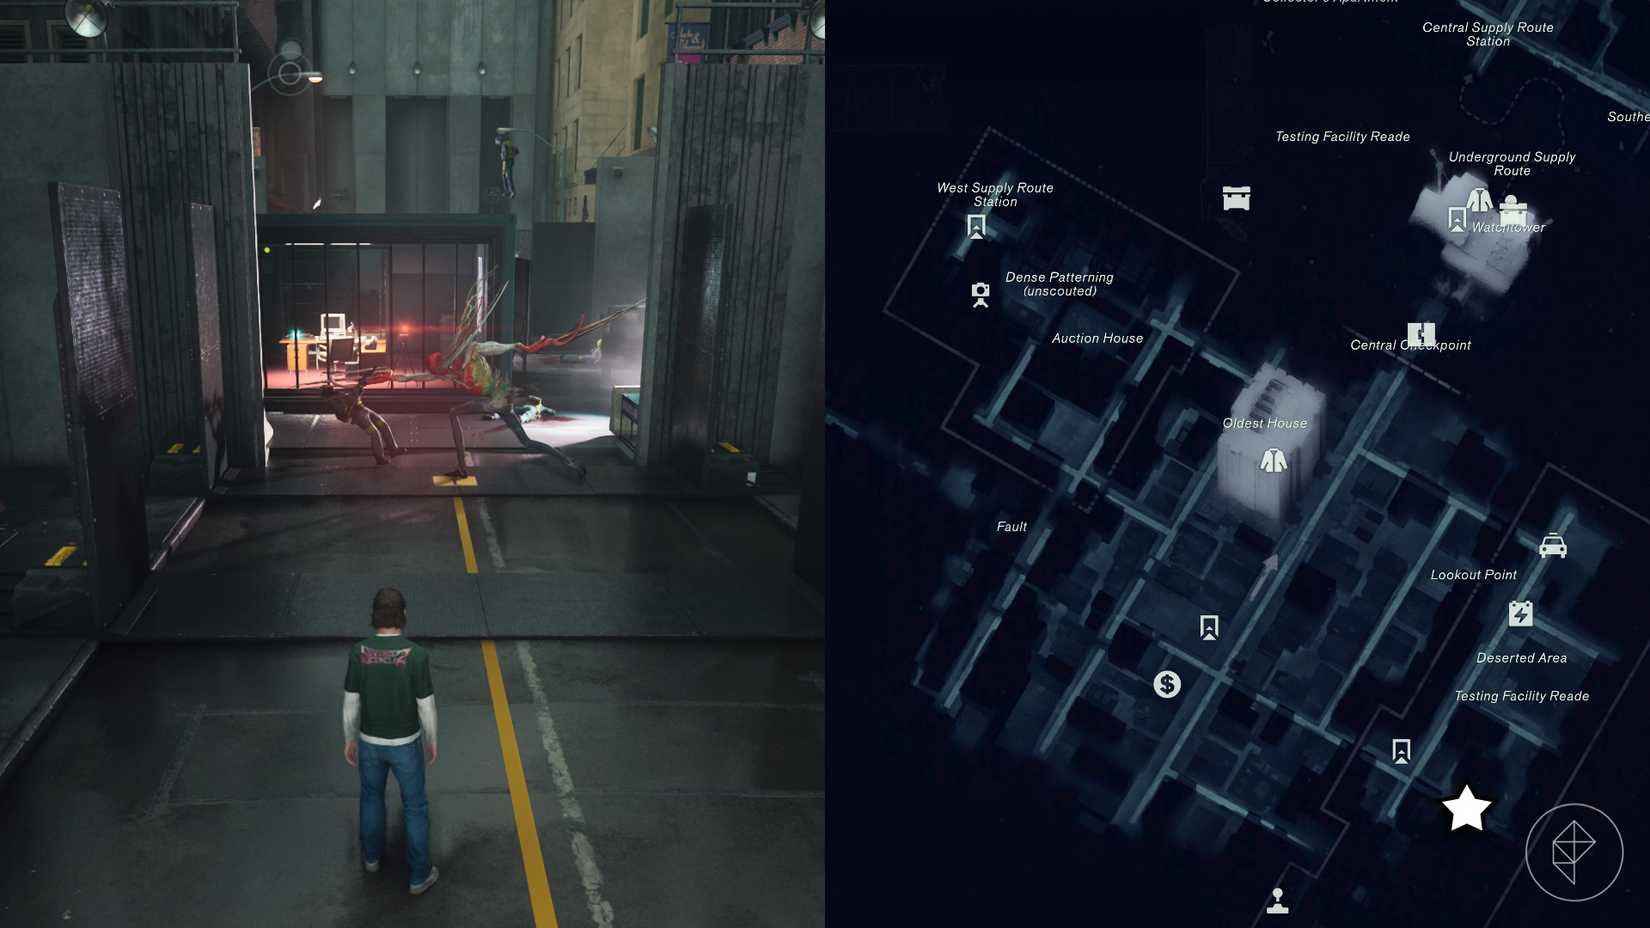
The second Downtown camera is situated deep within the southeast corner of the eastern region, an area that demands the Reach traversal ability, acquired via the Subway Fault in the Evacuation Zone. To access this section, players must travel to Lookout Point and deploy Reach on an elevated metal platform. Below this vantage point lie several power cores, one of which is required to unlock a secure door protecting the camera. Navigating this sequence efficiently is greatly aided by acquiring the "Extended Rush" talent and practicing the precise route across the surrounding rooftops and construction sites, ultimately allowing players to transfer an electrical charge through a series of uncharged power cores to unlock the final barrier.
Central ‘Freeze Frame’ Camera Locations
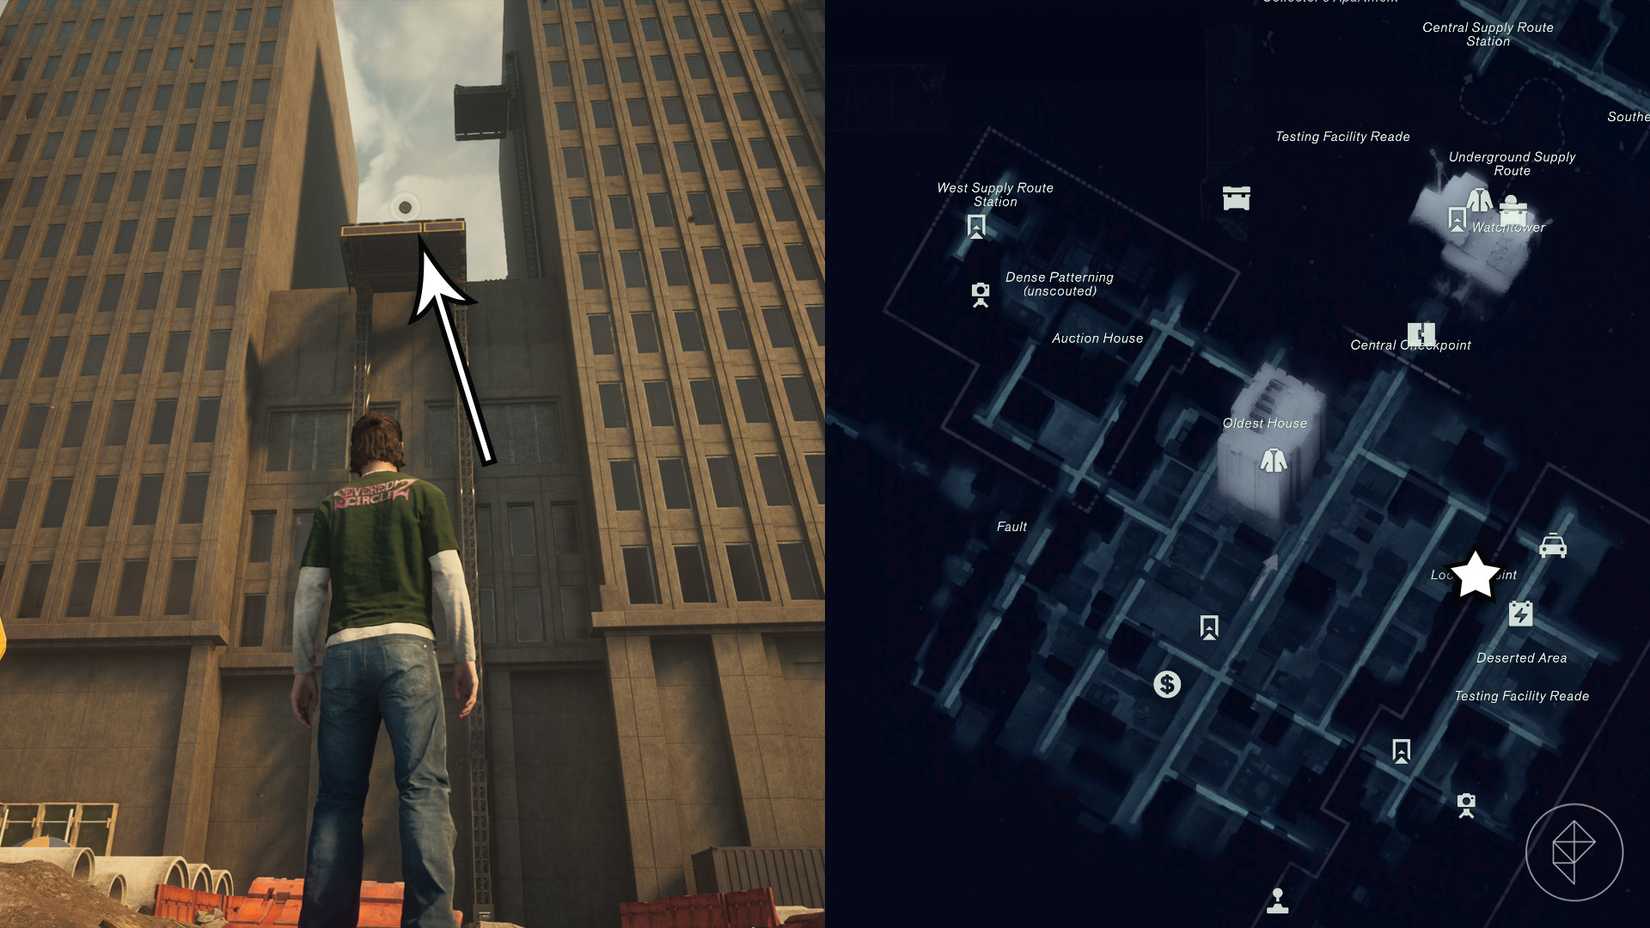
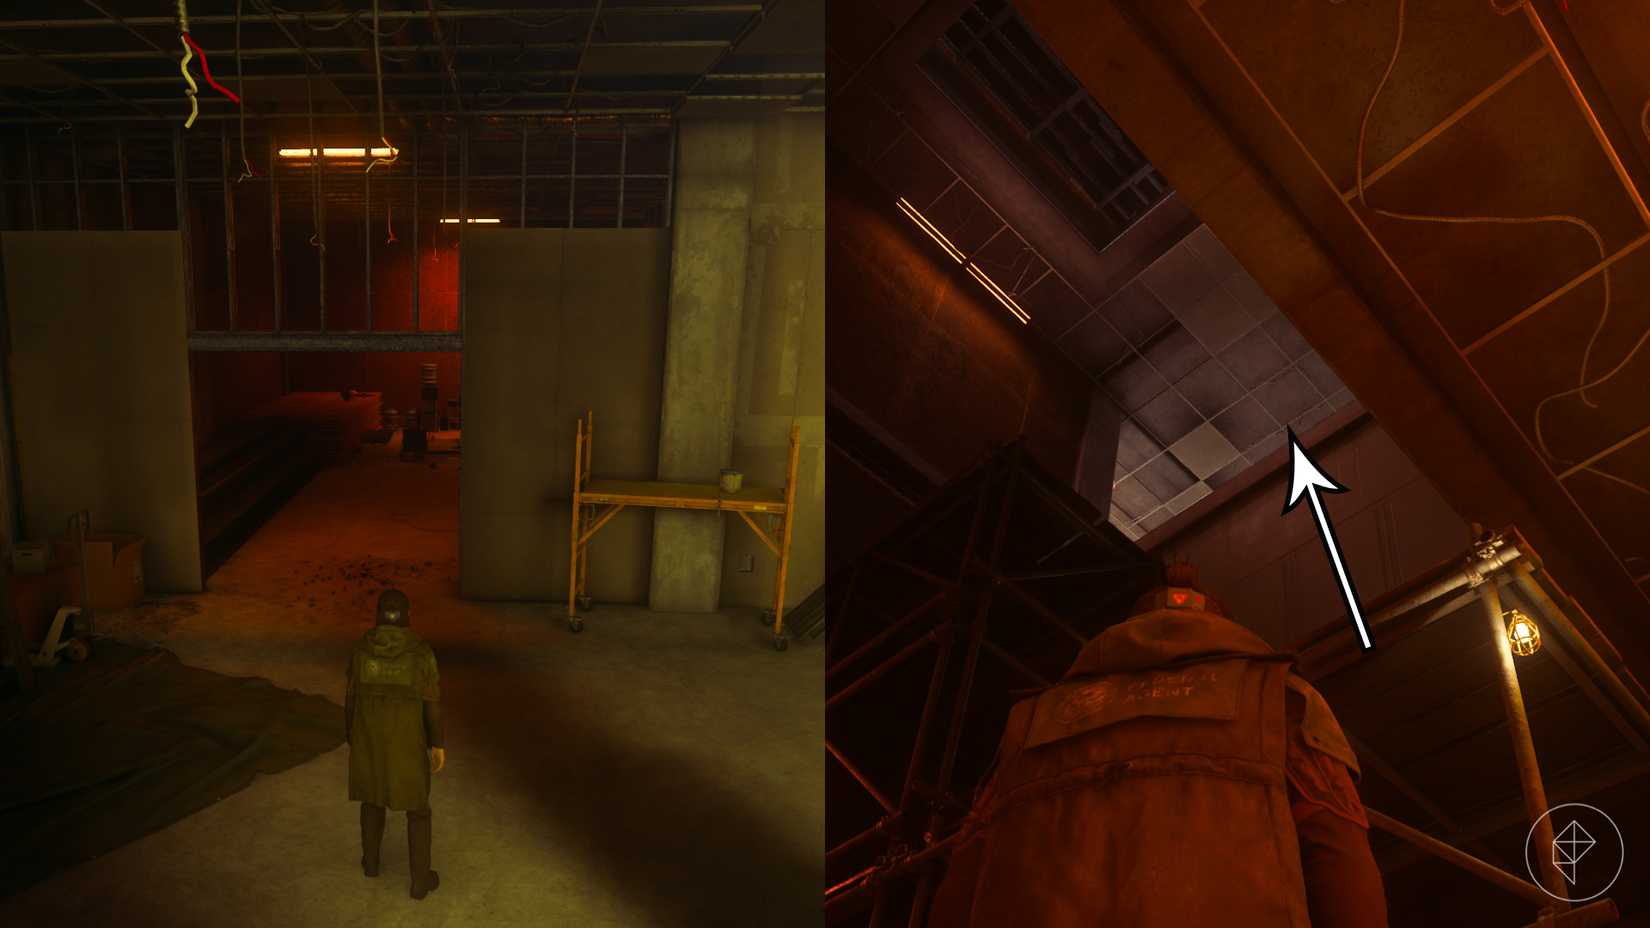
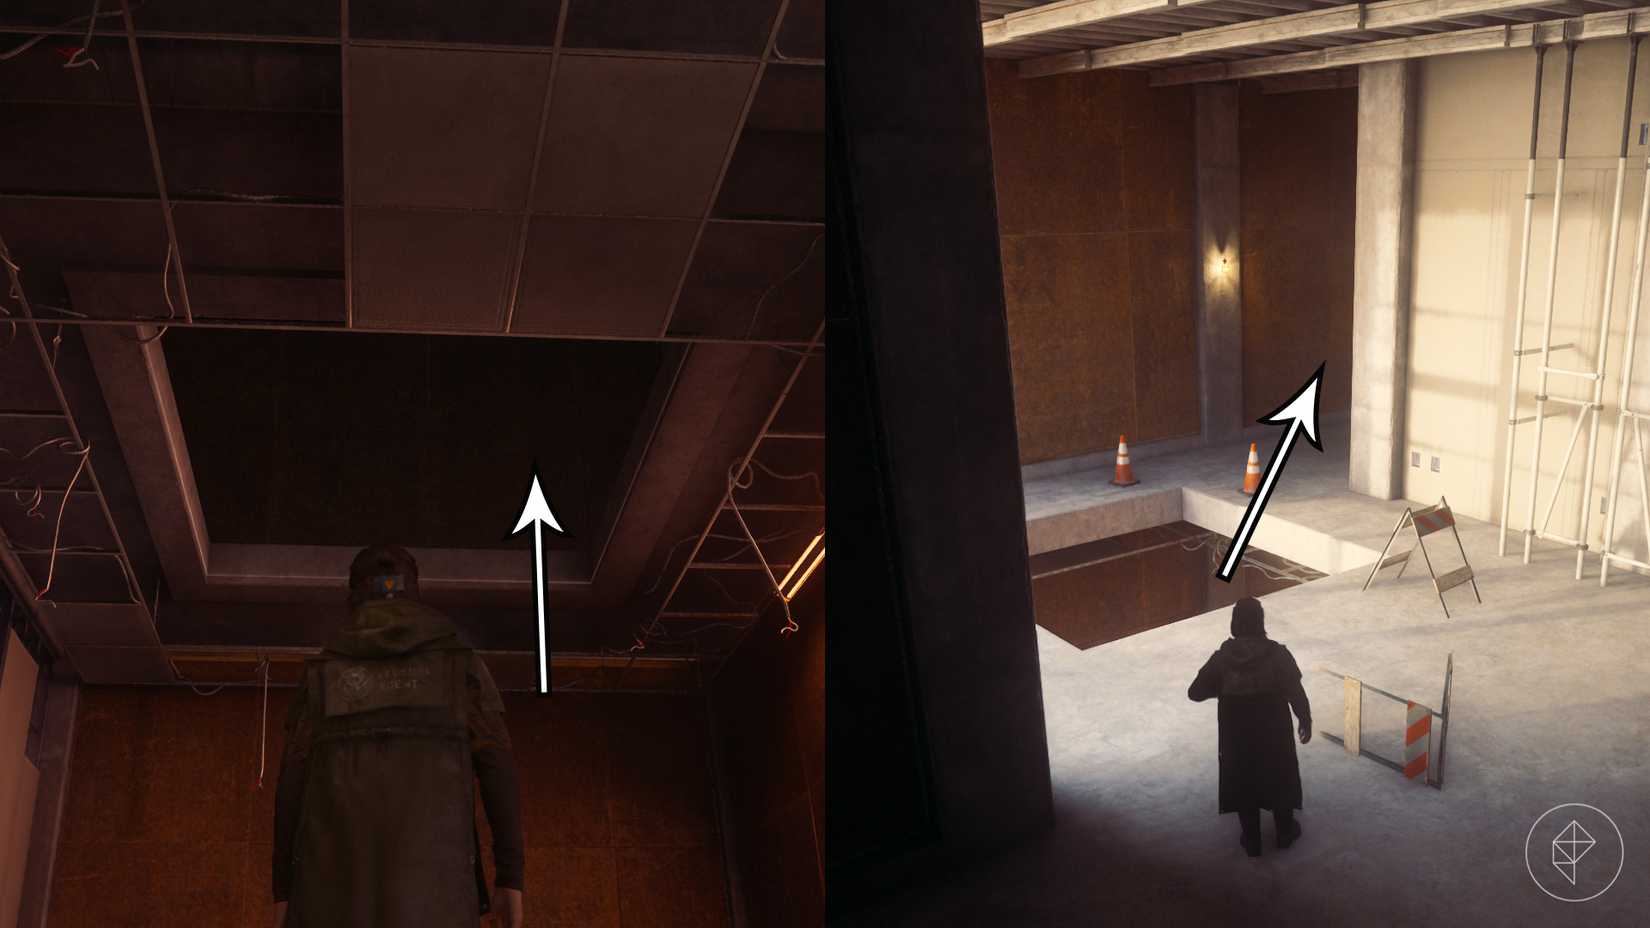
Central introduces players to their very first encounter with the anomalous recording devices, located within the Watchtower structure. Positioned on the lowest floor just beneath the elevator access, the camera resides near an orange-red lit room. Players must ascend the scaffolding in the eastern corner while exercising extreme caution to avoid stepping into the illuminated hallway, which immediately triggers the camera’s freezing mechanism. By utilizing structural holes in both the ceiling and the floor, players can successfully maneuver behind the device’s lens to shut it down safely.
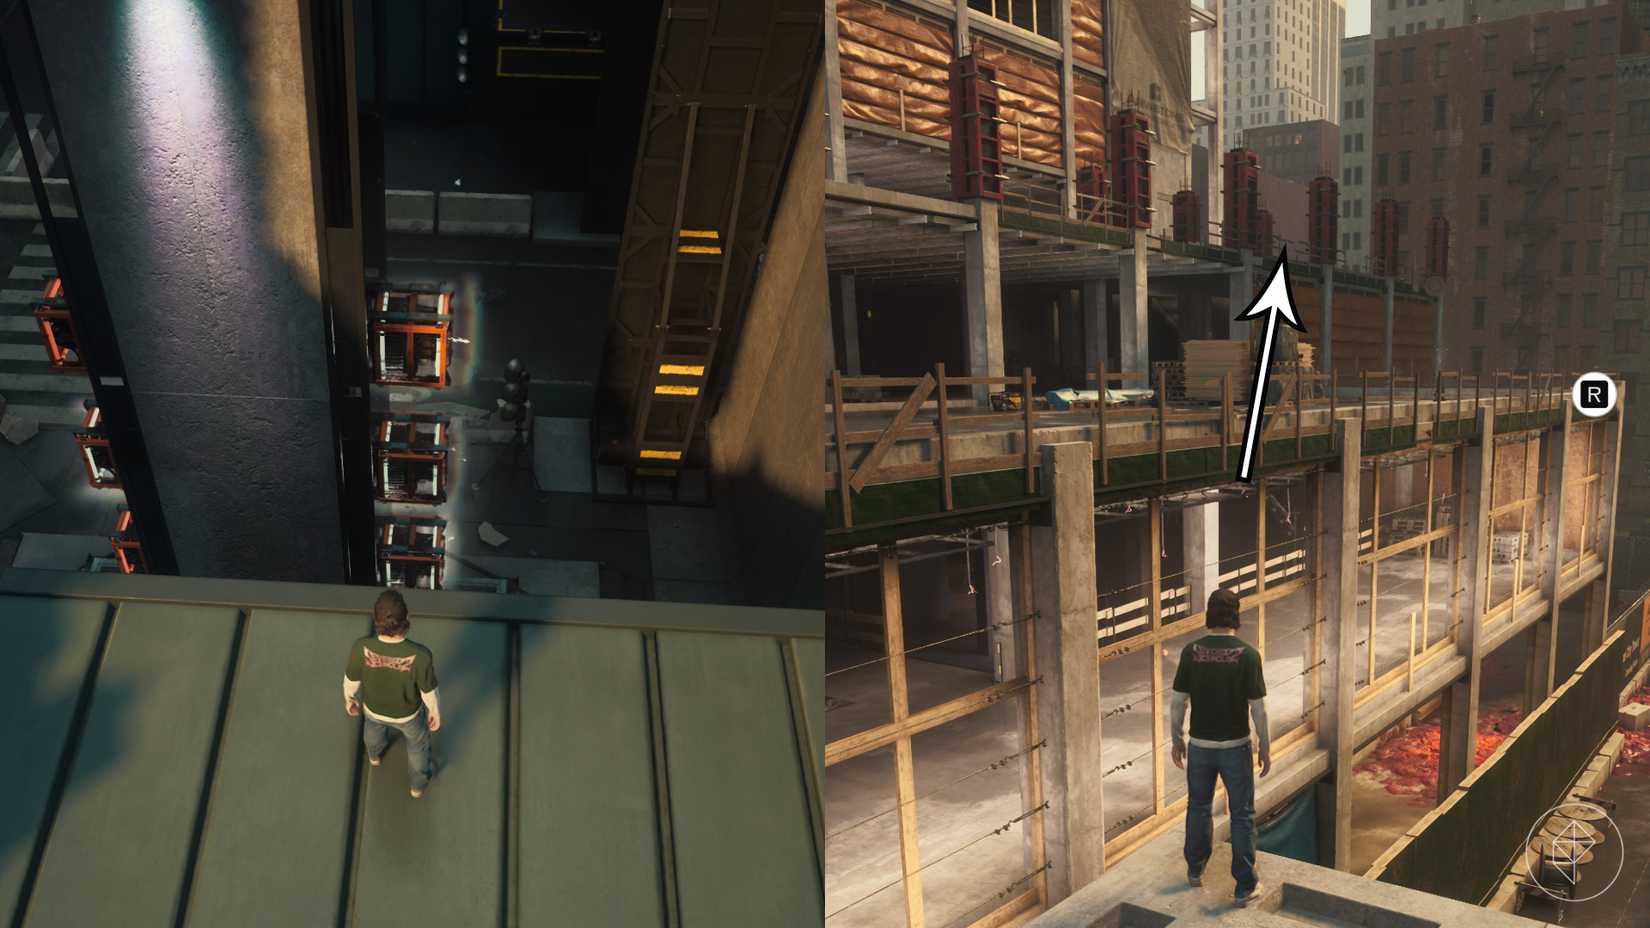
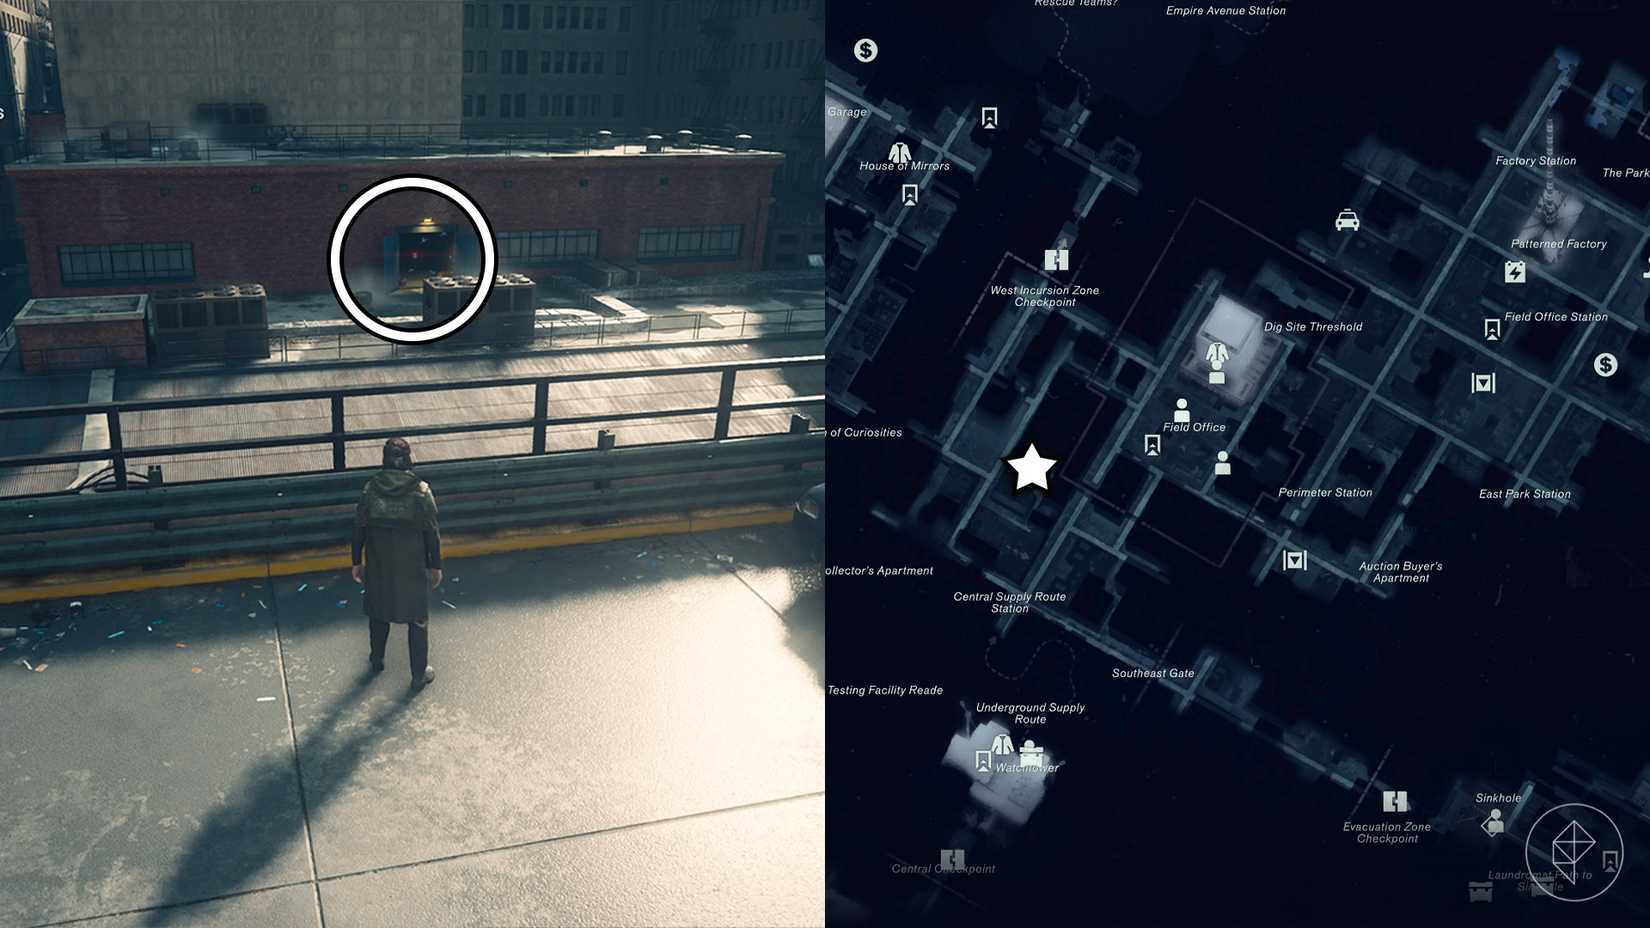
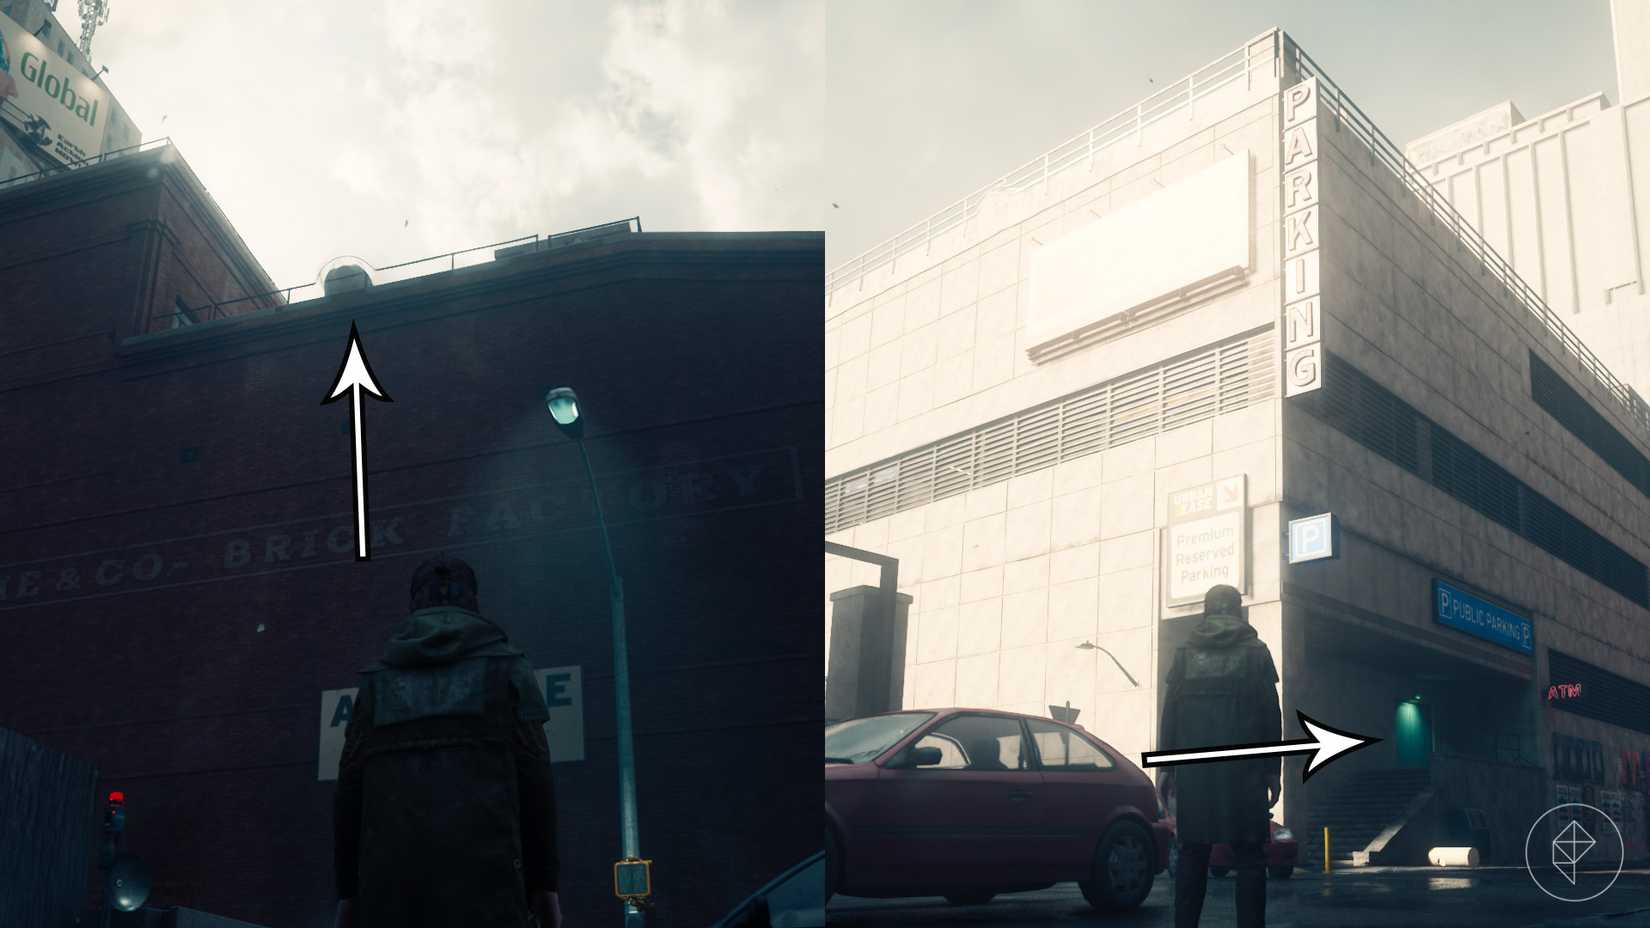
The second Central camera waits on the top floor of a brick factory situated northeast of the parking garage. Access to this location can be achieved either by navigating the parking garage—which requires clearing out a dense concentration of hostile entities—or by using the Reach ability from the exterior to bypass the interior skirmish entirely. Interestingly, disarming this specific unit requires an unconventional tactical choice: players must intentionally allow themselves to be caught within its field of view. Once the camera temporarily deports itself following a successful capture, the player must descend to the bottom floor of the building, eliminate the remaining threats, and open a red exterior door. Stepping outside prompts the camera to rematerialize, allowing the player to retrace their steps to the upper floor and disable it from behind.
West Incursion Zone ‘Freeze Frame’ Camera Locations
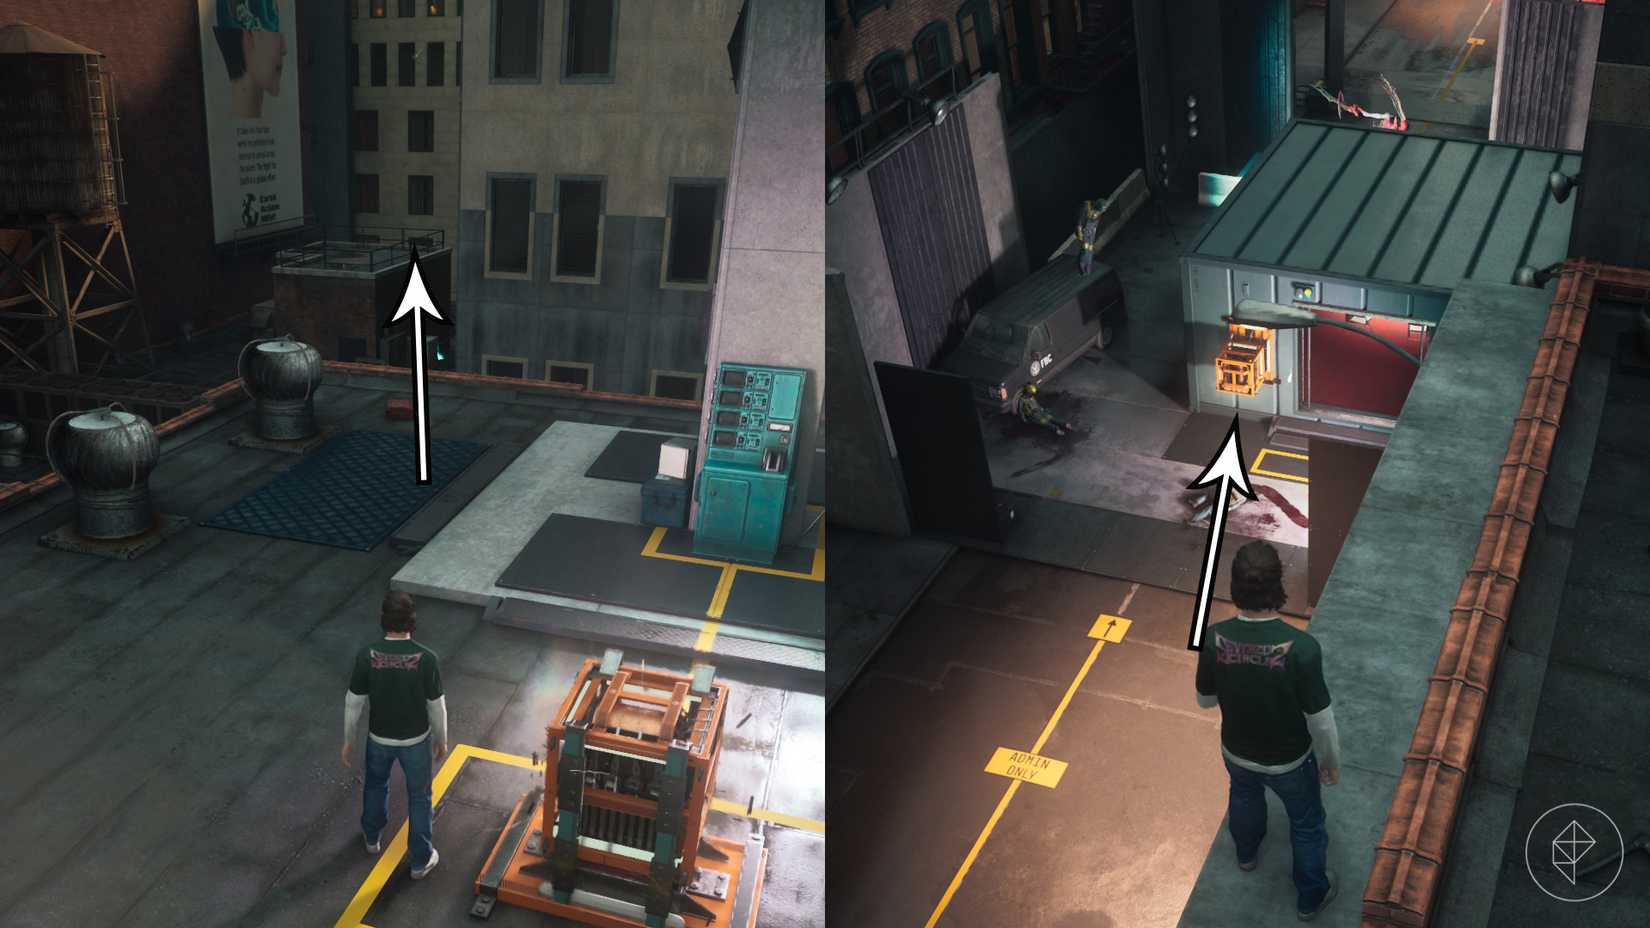
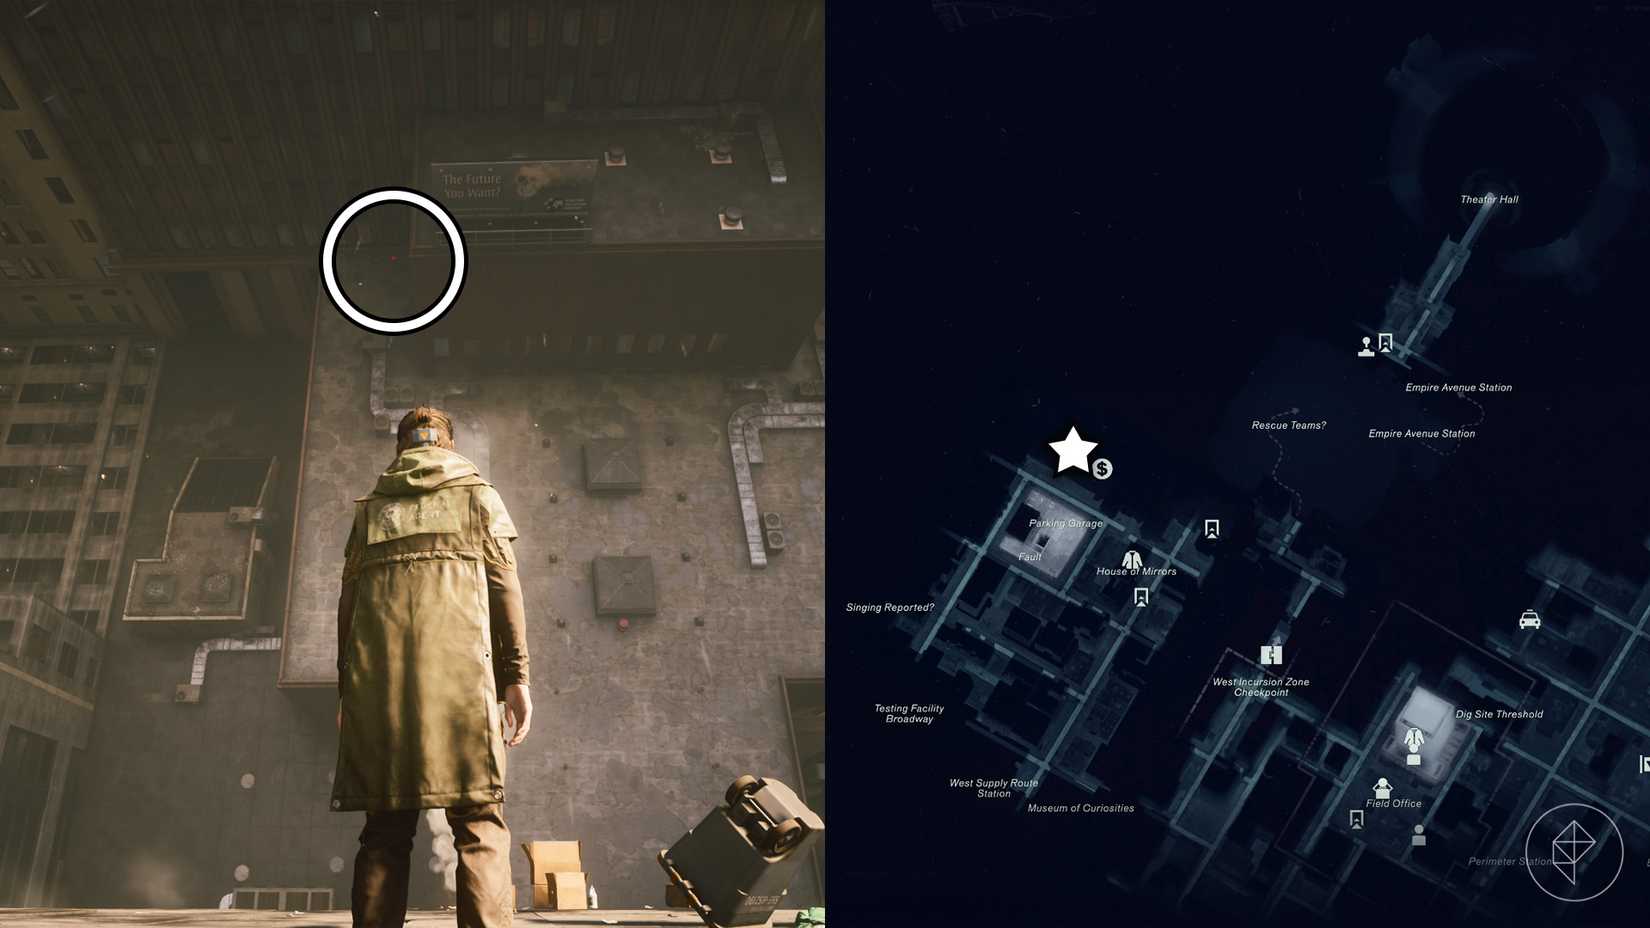
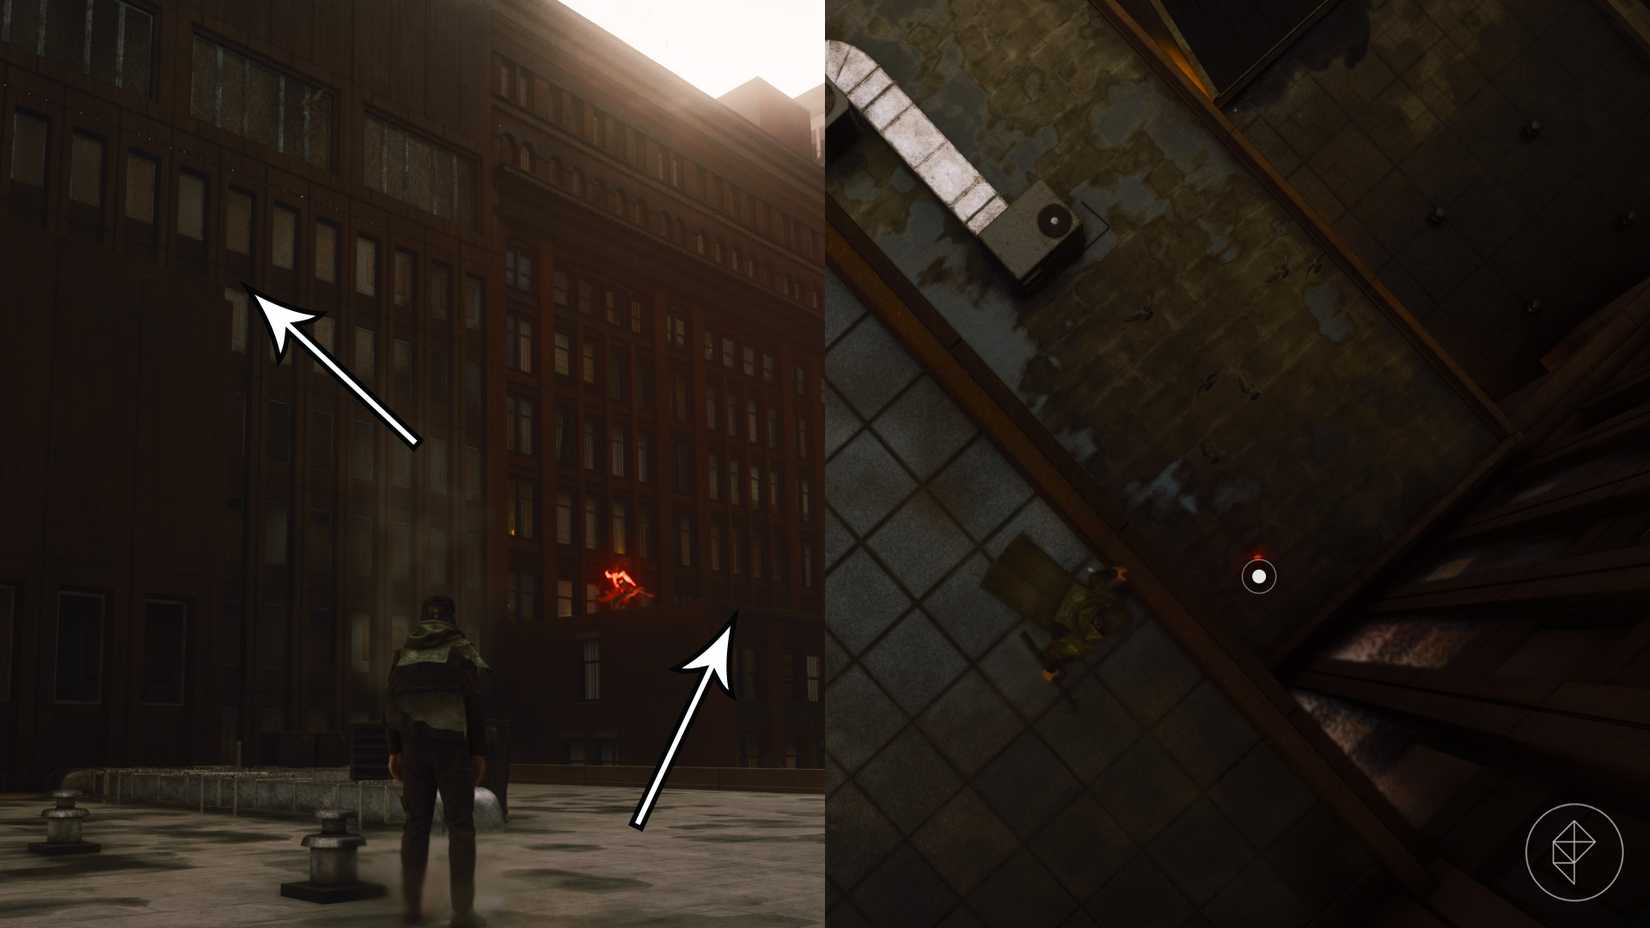
Navigating the West Incursion Zone necessitates the prior completion of the Incursion Fault inside the Parking Garage to secure the Shift traversal ability. The first camera in this zone is located immediately northeast of the Parking Garage atop a sideways-oriented building, identifiable by a faint red light near its upper structure. Utilizing Shift, players can access the building’s surface, navigate carefully to an adjacent higher rooftop via a short series of jumps, and drop directly behind the camera to close its lid.
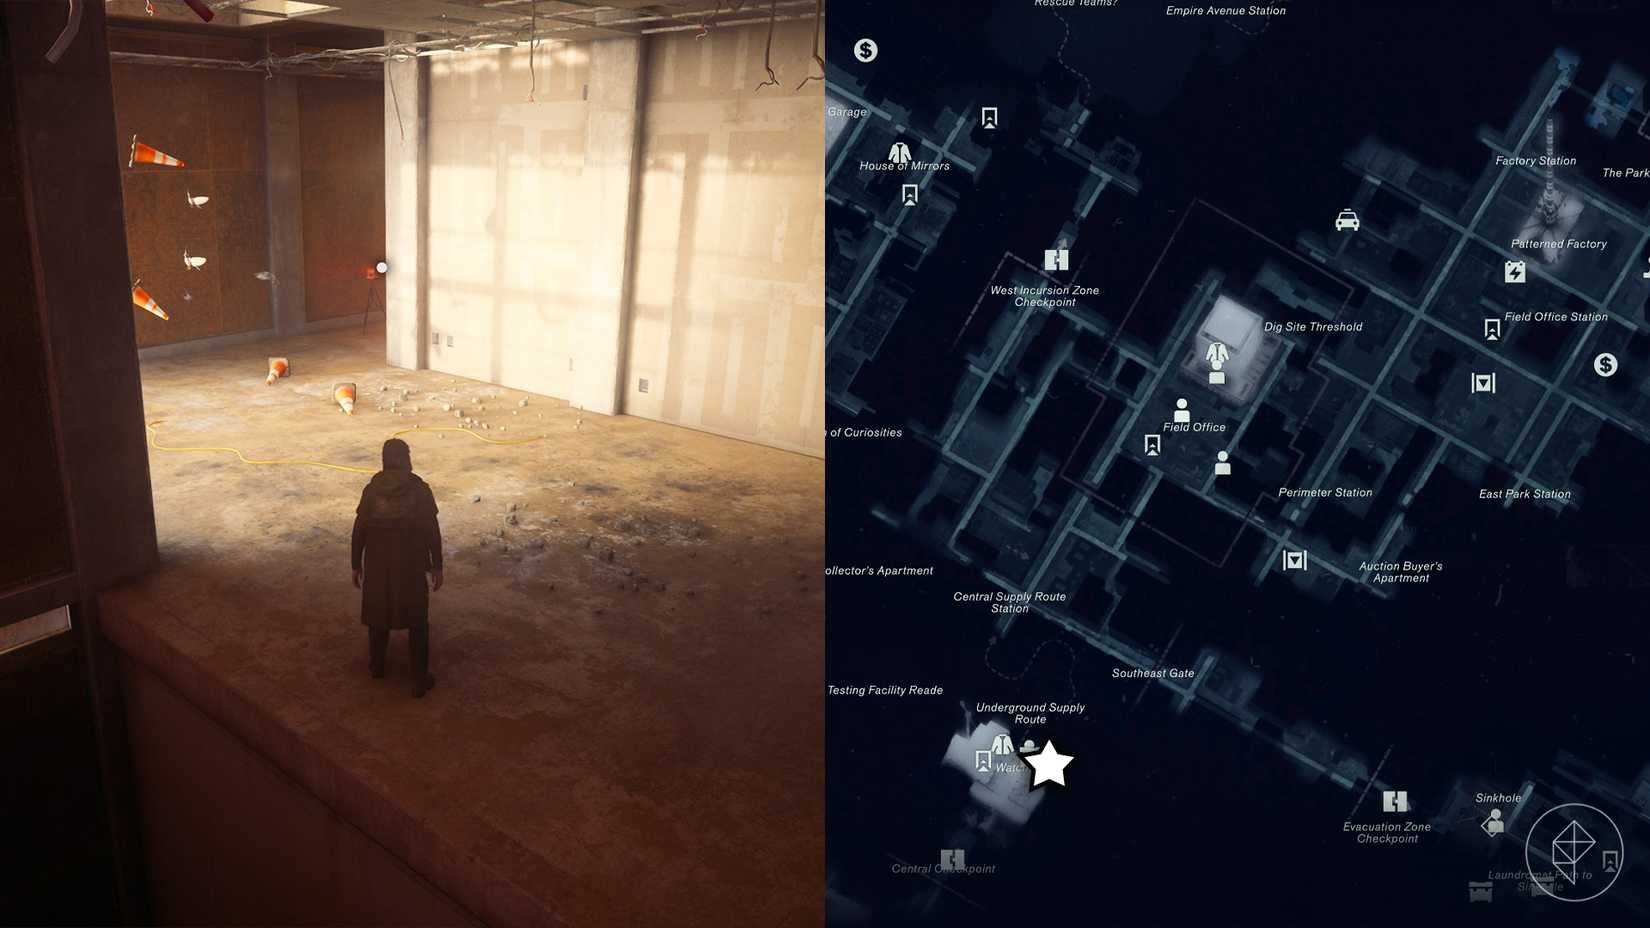
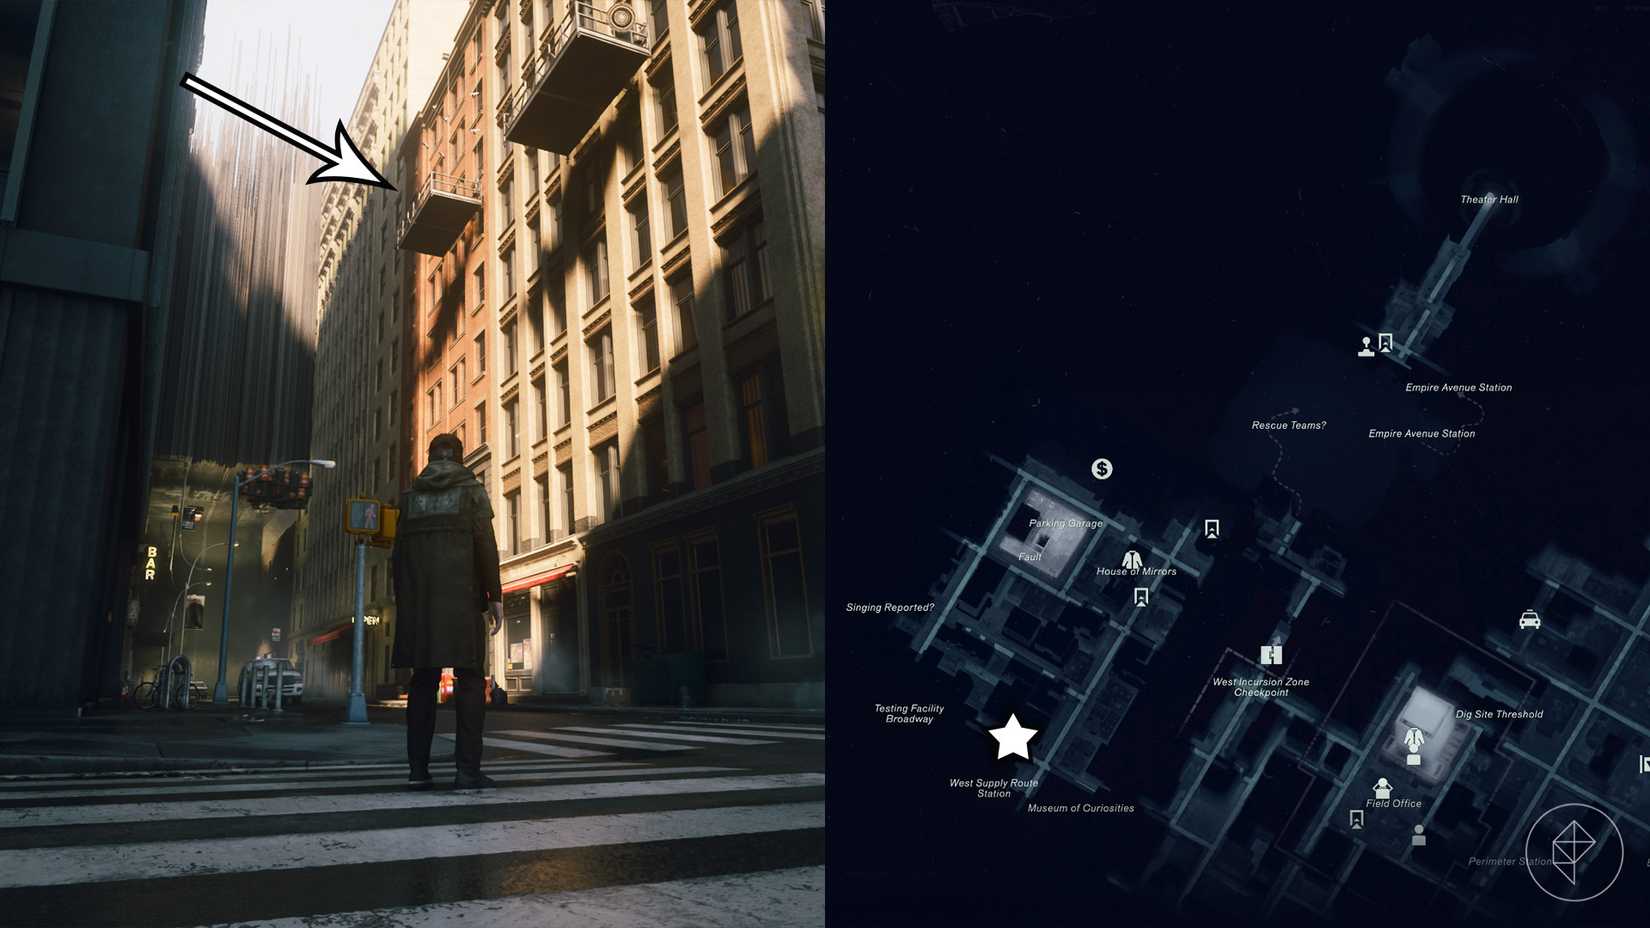
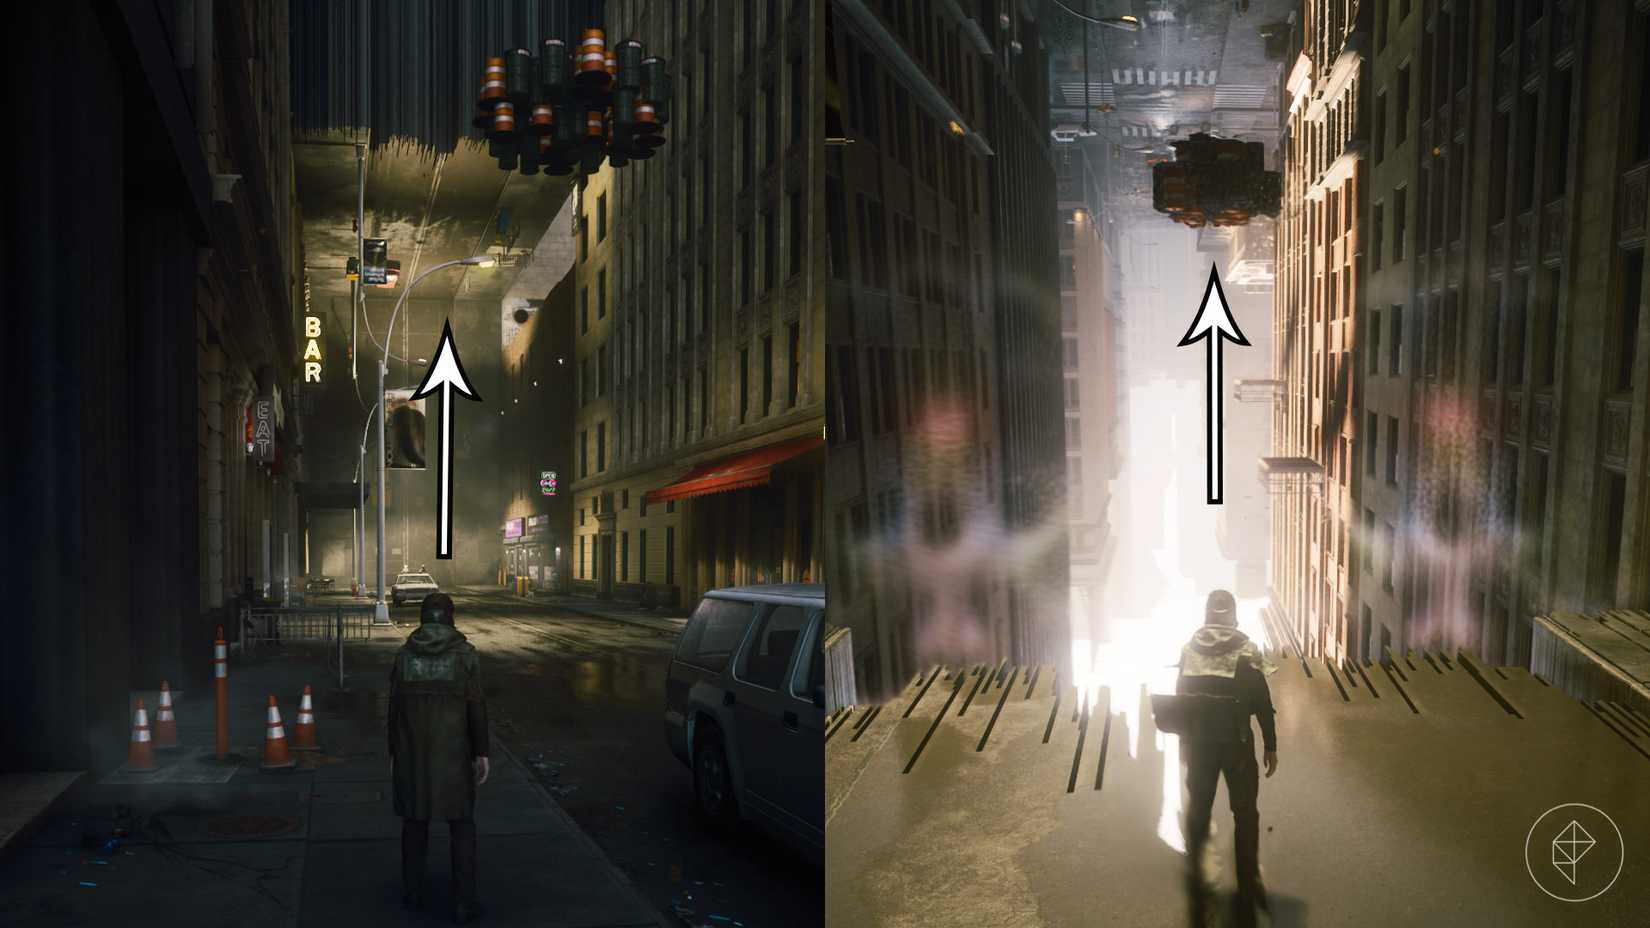
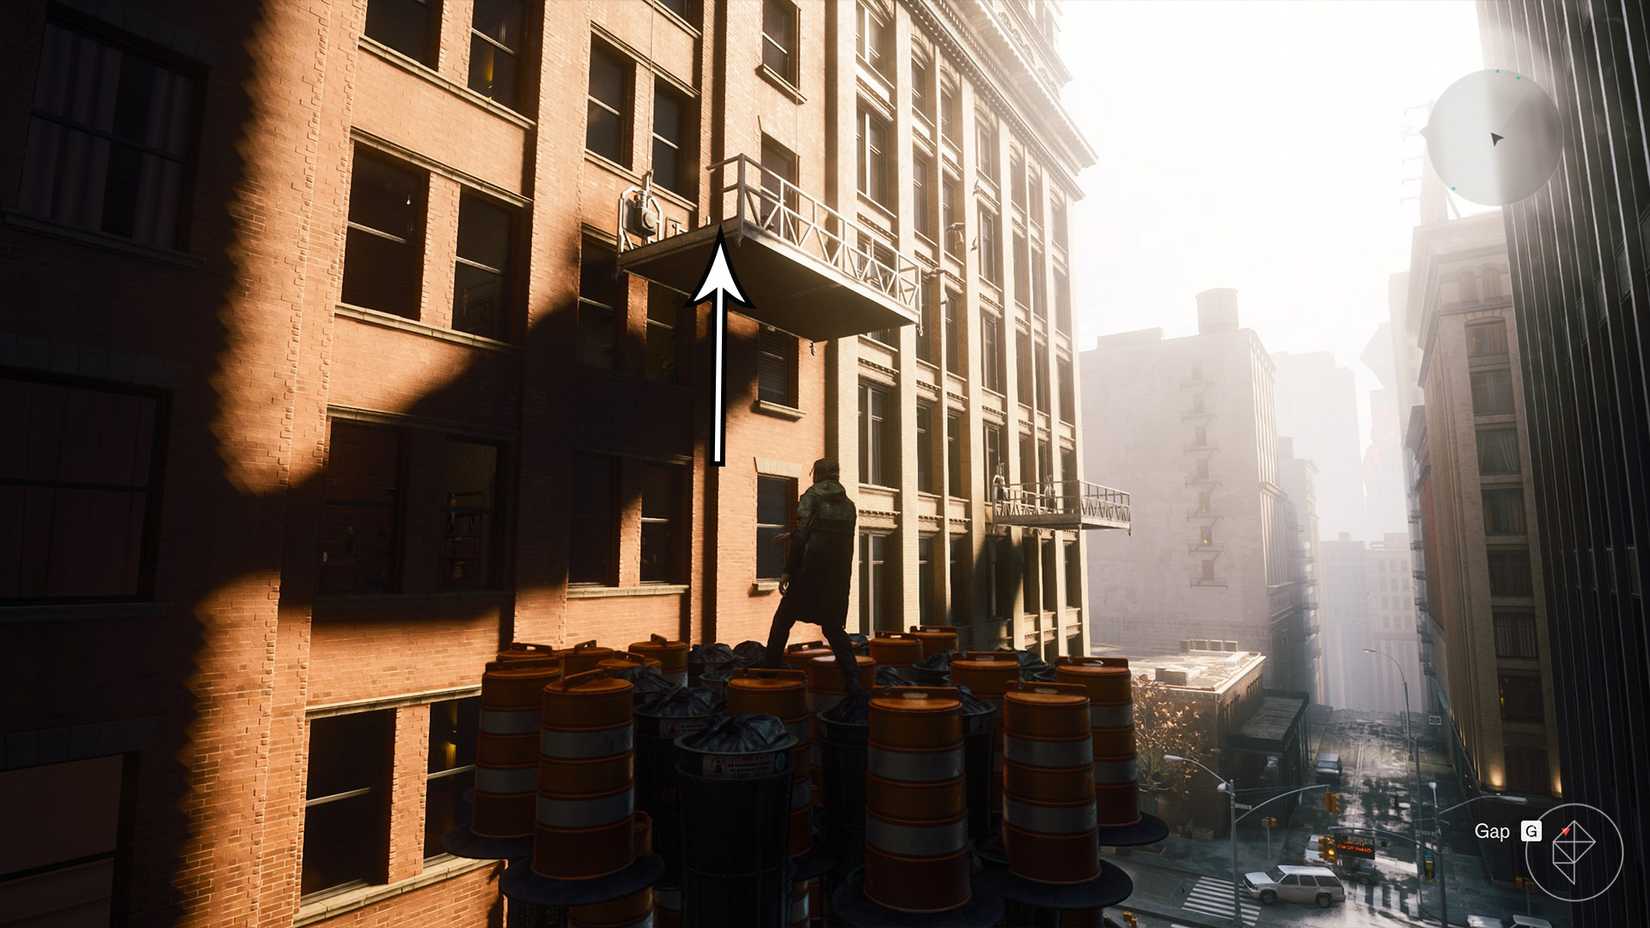
The second West Incursion Zone camera hangs from a suspended scaffolding platform in the southeastern sector, positioned northwest of the Museum of Curiosities. To reach this precarious perch, players must journey west down the street, use Shift to walk along the ceiling-level roadway, and locate a floating platform composed of debris and traffic cones. Stepping deliberately off the edge without jumping initiates a visual screen inversion, enabling the player to leap across the floating debris field and onto the elevated scaffolding directly behind the target.
Evacuation Zone ‘Freeze Frame’ Camera Locations
The Evacuation Zone houses two cameras that test both environmental puzzle-solving and movement precision. The first unit is situated on the eastern side of the district, southwest of the "Main Street" fast travel portal and its corresponding map pylon. Shutting down this camera requires a complex, multi-stage electrical transfer puzzle involving a sequence of power cores stretching from south of the Evac Building down the street, up through a metal platform leading to a rooftop, and ultimately into the core that powers the door shielding the camera.
The second Evacuation Zone camera rests upon a building just south of the Railyard Street Station, an area requiring the Reach ability obtained from the Subway Fault. Similar to the brick factory encounter in Central, players must intentionally trigger this camera’s gaze, causing it to vanish temporarily. By entering the building, exiting through the ground-floor front door to force the camera’s return, and ascending back to the top floor through the interior corridor, players can approach the device safely from behind.
The Park ‘Freeze Frame’ Camera Locations
The Park presents unique environmental challenges, starting with a camera positioned on a suspended scaffolding platform outside the southern sewer entrance. Accessing this sector initially requires navigating through the northern sewer system and exiting southward. To power the mechanism, players must manipulate a power core sequence originating further down the road near the elevators, ride the platform upward, and glide across to the targeted lower ledge.
The second camera within The Park is housed deep within the Nomad Avenue Station in the southwest sector, situated near a mold-choked chasm and a derelict movie theater. Descending into the station reveals the camera on the right, protected by a doorway choked in dense white mold. Players must employ either the Ignite or Inferno combat abilities—unlocked by defeating The Deserter resonant in Central—to incinerate the blockage and loop around to the rear of the device.
Underpass ‘Freeze Frame’ Camera Locations
The Underpass features heavily fortified subterranean installations, with its first camera located near the entrance as players follow a trail of glow sticks toward The Spire. Pinned inside a pillar alongside frozen adversaries, this camera can be bypassed by leveraging a Reach point situated just beneath the lens, followed by dropping into a hole that leads through a subterranean corridor.
The second Underpass camera is mounted on a pillar directly south of Tubes Island, the focal point of the Underpass Fault. Upon entering an area dominated by blue mold and hostile entities, players must locate an elevated opening that defies standard elevation traversal. By navigating to the right, using Reach to cling to a red-carpeted ceiling, and employing Shift to traverse a wall-mounted route toward a concealed floor hatch, players can successfully drop down behind the camera enclosure.
Unknown Zone ‘Freeze Frame’ Camera Locations
The mysterious Unknown zone contains two final camera placements within its shifting geography. The first sits on the upside-down portion of the central island’s construction site, occupying the bottom floor. Navigating down from the second-floor stairwell triggers an ambush by multiple enemies, after which players must locate a large mold growth beside the eastern wall where the camera is positioned.
The second Unknown camera is located inside a laundromat on Factory Island, the southwesternmost island in the zone. Because approaching the street directly triggers the camera’s freezing effect, players must use Reach to access the right-hand building, traverse the rooftops, drop into an open garage, and enter the interior rooms to flank the device.
Final Containment and Resolution
Upon successfully neutralizing all individual cameras across the various zones, player contacts indicate a massive containment breach outside the Oldest House, where a final line of seven rogue cameras has materialized. This concluding encounter introduces a dynamic challenge: shutting the lid of any single camera causes the remaining units to instantly teleport to new vantage points. Furthermore, failing to avoid their combined lines of sight resets the encounter phase entirely.
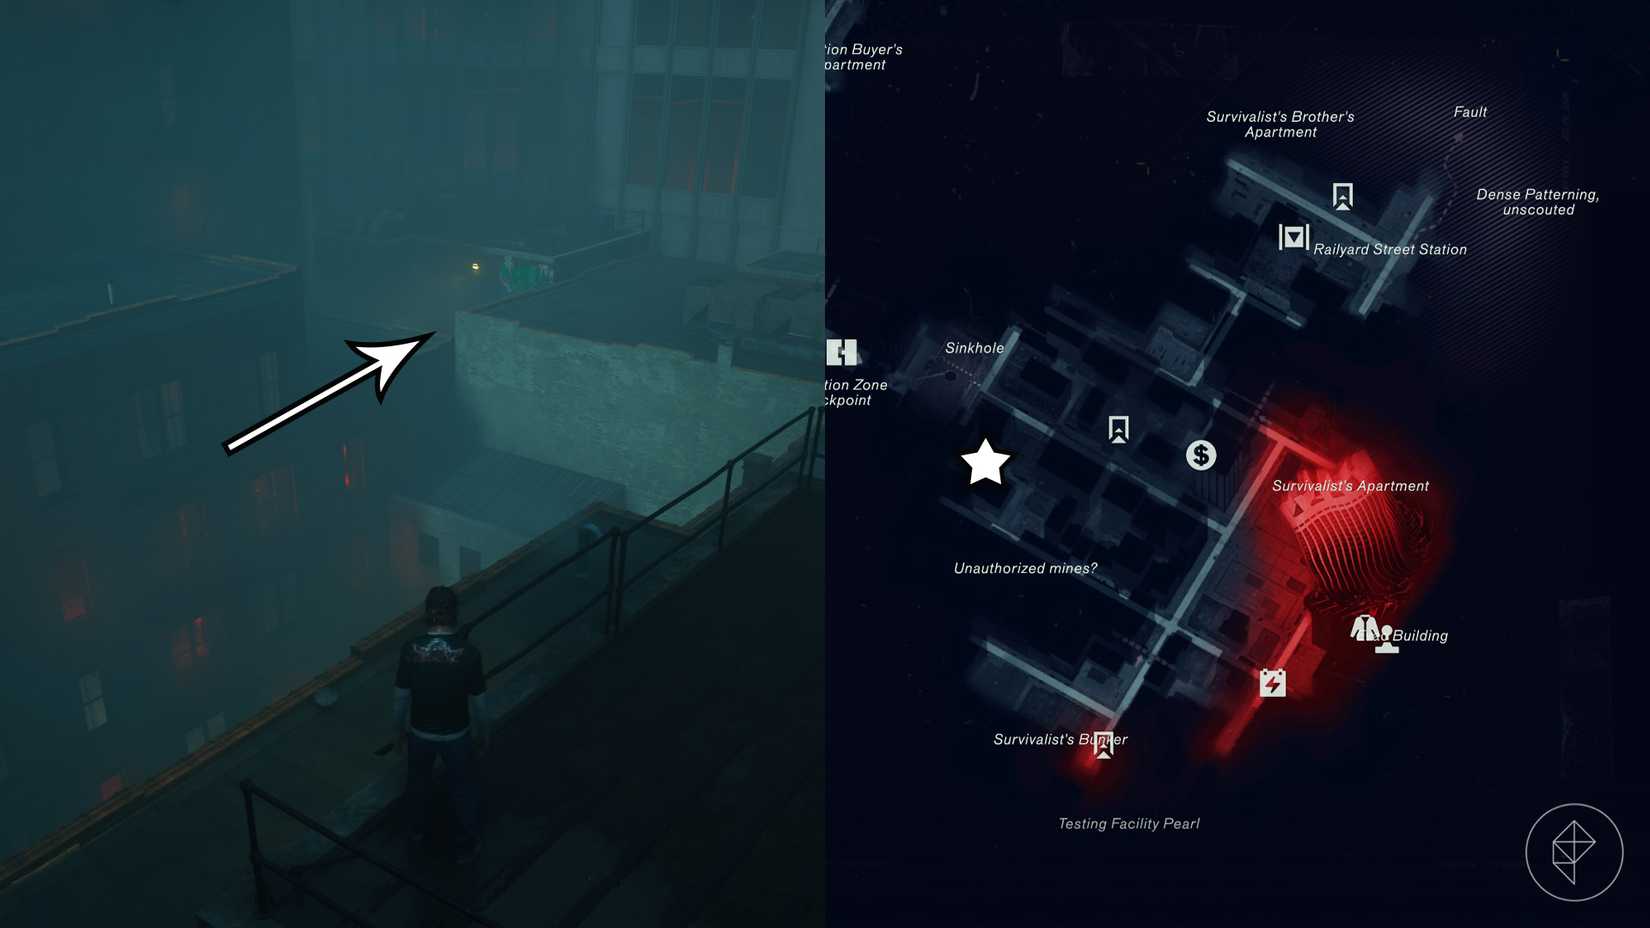
Approaching the initial lineup from the eastern flank prevents premature triggering. As the cameras teleport sequentially to nearby rooftops, concrete walls, and ground-level positions, players must utilize a combination of alleyway traversal, Reach platforming, and careful line-of-sight management to isolate and deactivate each unit. Once the final central camera is neutralized, the quest concludes, rewarding the player with the Shiny Pebble artifact recipe—a valuable asset capable of gradually restoring up to 50 percent of the player’s health while operating within gravity anomalies.


Leave a Reply